Initial setup
Installing QGroundControl
QGroundControl is a software package that can be used to flash, configure and calibrate the flight controller.
Download and install the installer for Windows/Linux/macOS from the official QGroundControl website. Agree to install additional drivers if prompted.
See also the official QGroundControl documentation.
Flashing the flight controller
Download the latest stable firmware version from GitHub — download.
- For the
micoair_h743-v2flight controller:micoair_h743-v2_default.px4 - For the
pixracer_R15flight controller:px4fmu-v4_default.px4
Flashing instructions:
- Disconnect the flight controller from the computer (if connected).
- Launch QGroundControl.
- Go to the Vehicle Configuration panel (click the QGroundControl logo in the top-left corner) and select the Firmware menu.
- Connect the flight controller to the computer via USB.
- Select PX4 Flight Stack in the menu that appears on the right.
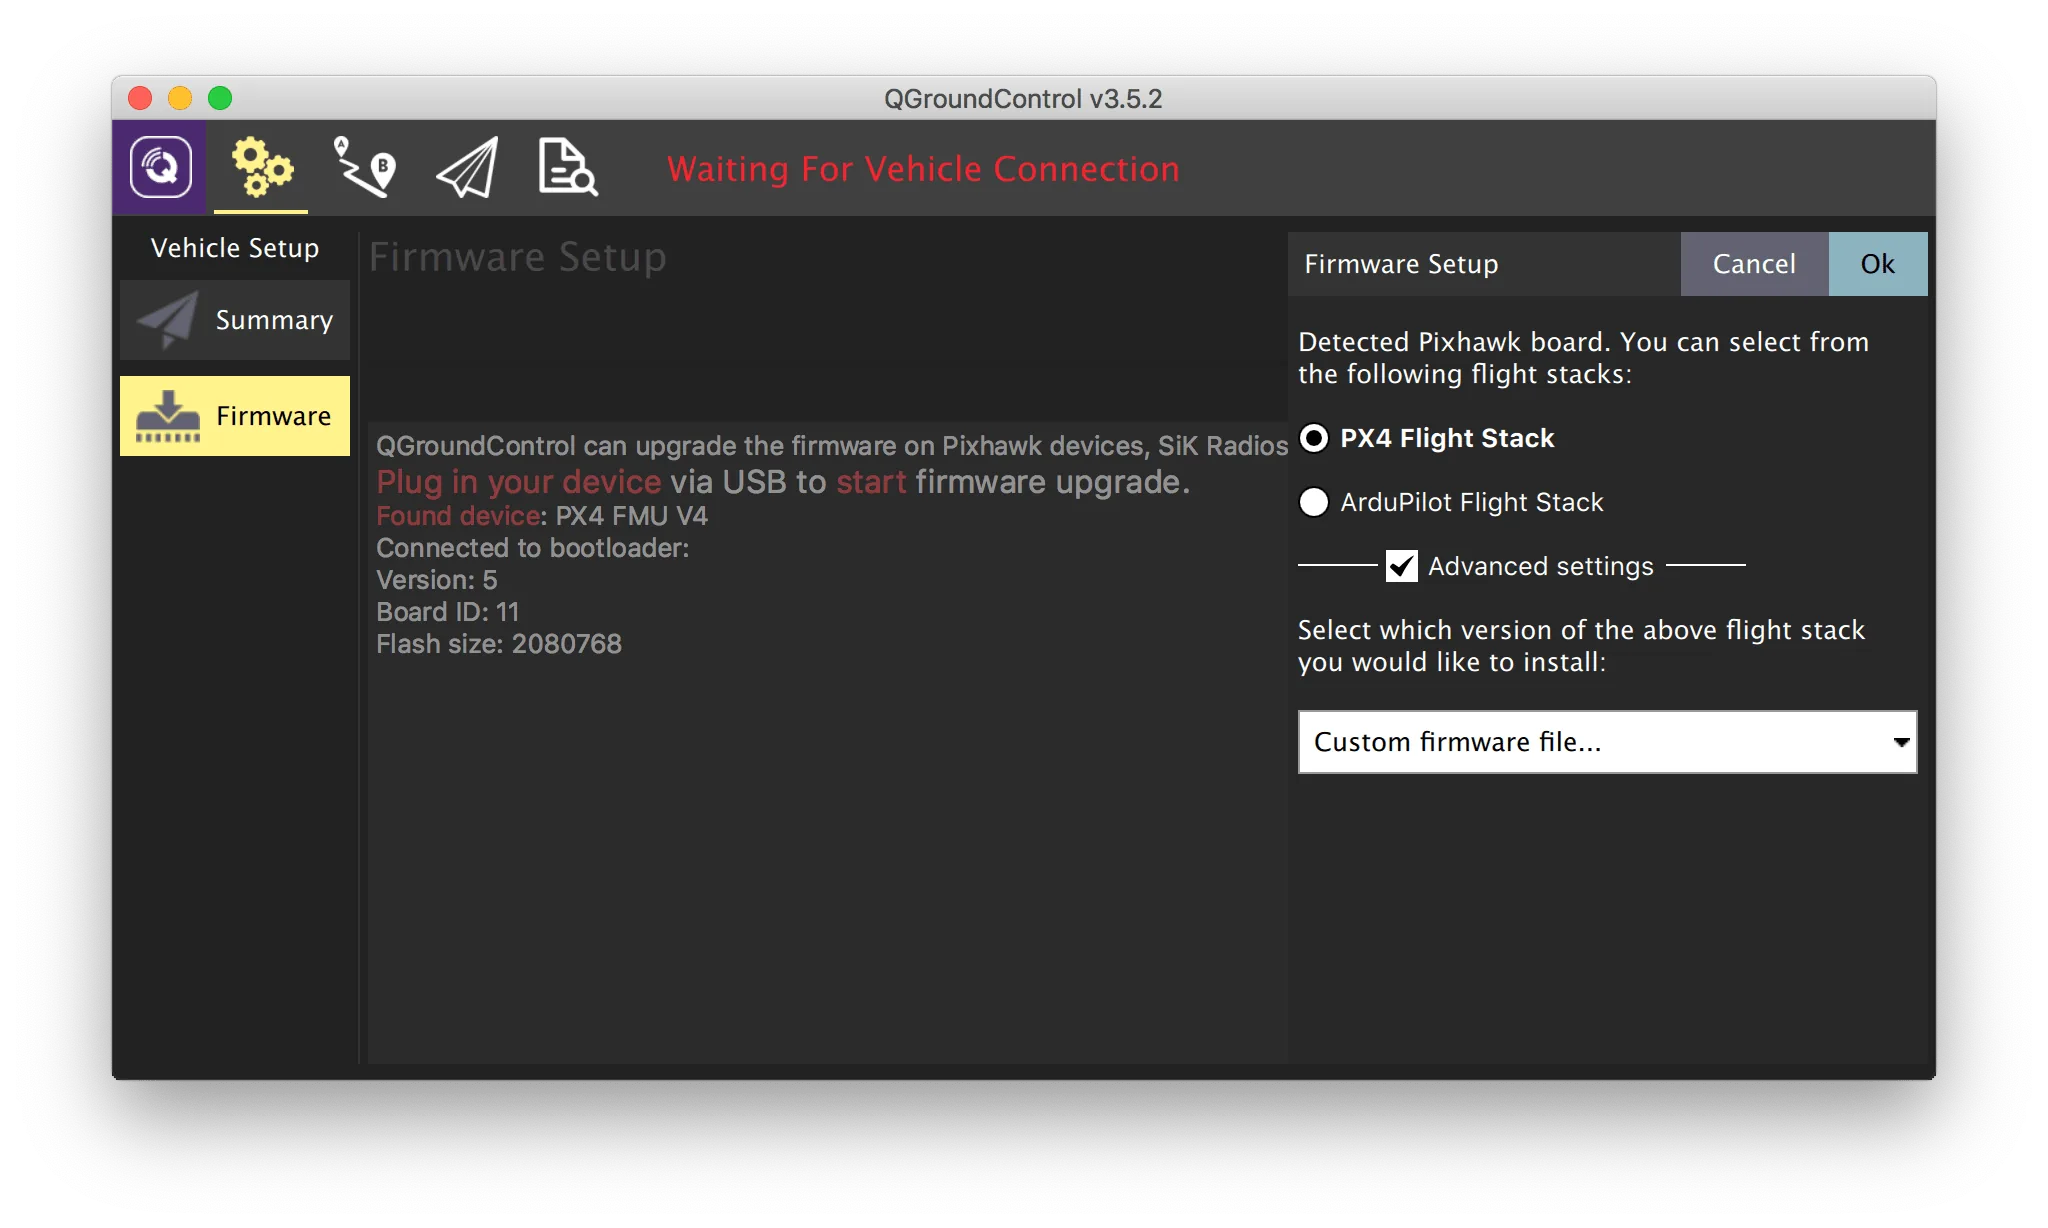
- To select and load the firmware file:
- Select Advanced settings.
- Choose Custom firmware file... from the dropdown menu.
- Press OK and select the downloaded firmware file.
Wait for QGroundControl to flash the firmware and reboot the flight controller.
Do not disconnect the flight controller from the computer during the flashing process.
Configuring the flight controller
All further configuration and calibration of the flight controller can be done wirelessly using Wi-Fi access to the flight controller via Raspberry Pi.
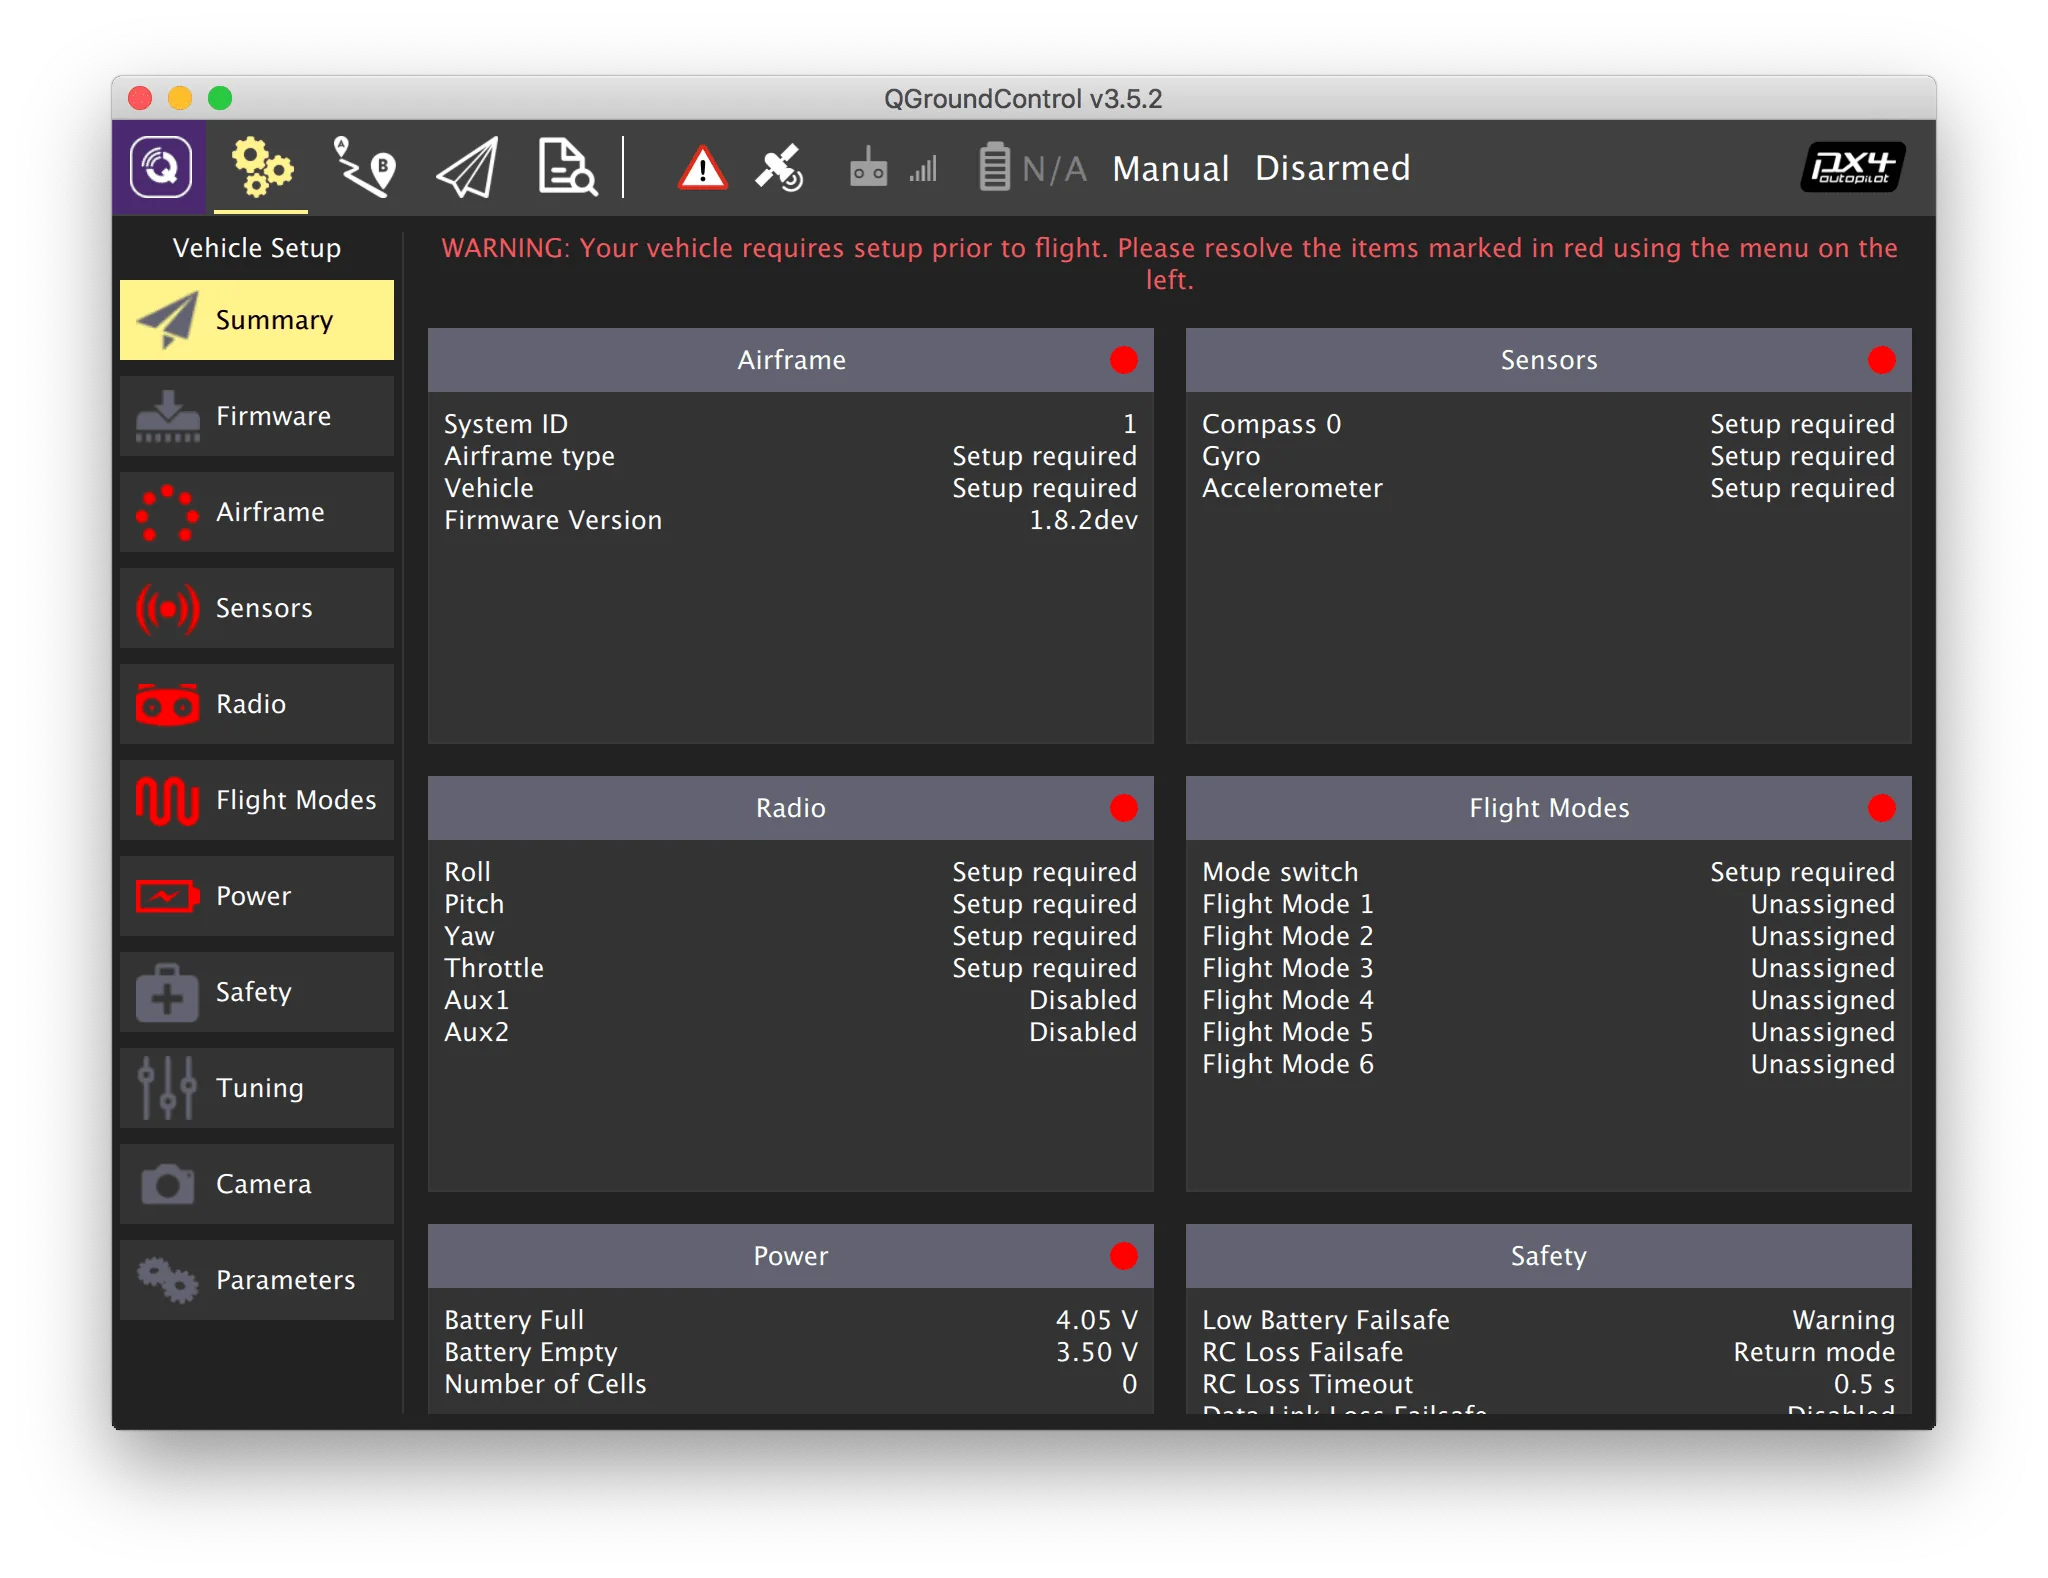
- Parameters requiring setup: Airframe, Radio, Sensors, Flight Modes.
- Current controller firmware.
- Current flight mode.
- Error messages.
Selecting the airframe

- Select the Airframe menu.
- Select the Quadrotor frame type.
- For Clover 4, select the COEX Clover 4 frame subtype. For Clover 5 — Generic Quadrotor.
- Scroll to the top of the list and press Apply and Restart, confirm by pressing Apply.
- Wait for the settings to apply and the flight controller to reboot.
Parameters
To configure flight controller parameters, go to the Vehicle Configuration tab and select the Parameters menu. Use the Search field to find parameters by name. Recommended parameters for Clover are provided in the further documentation.
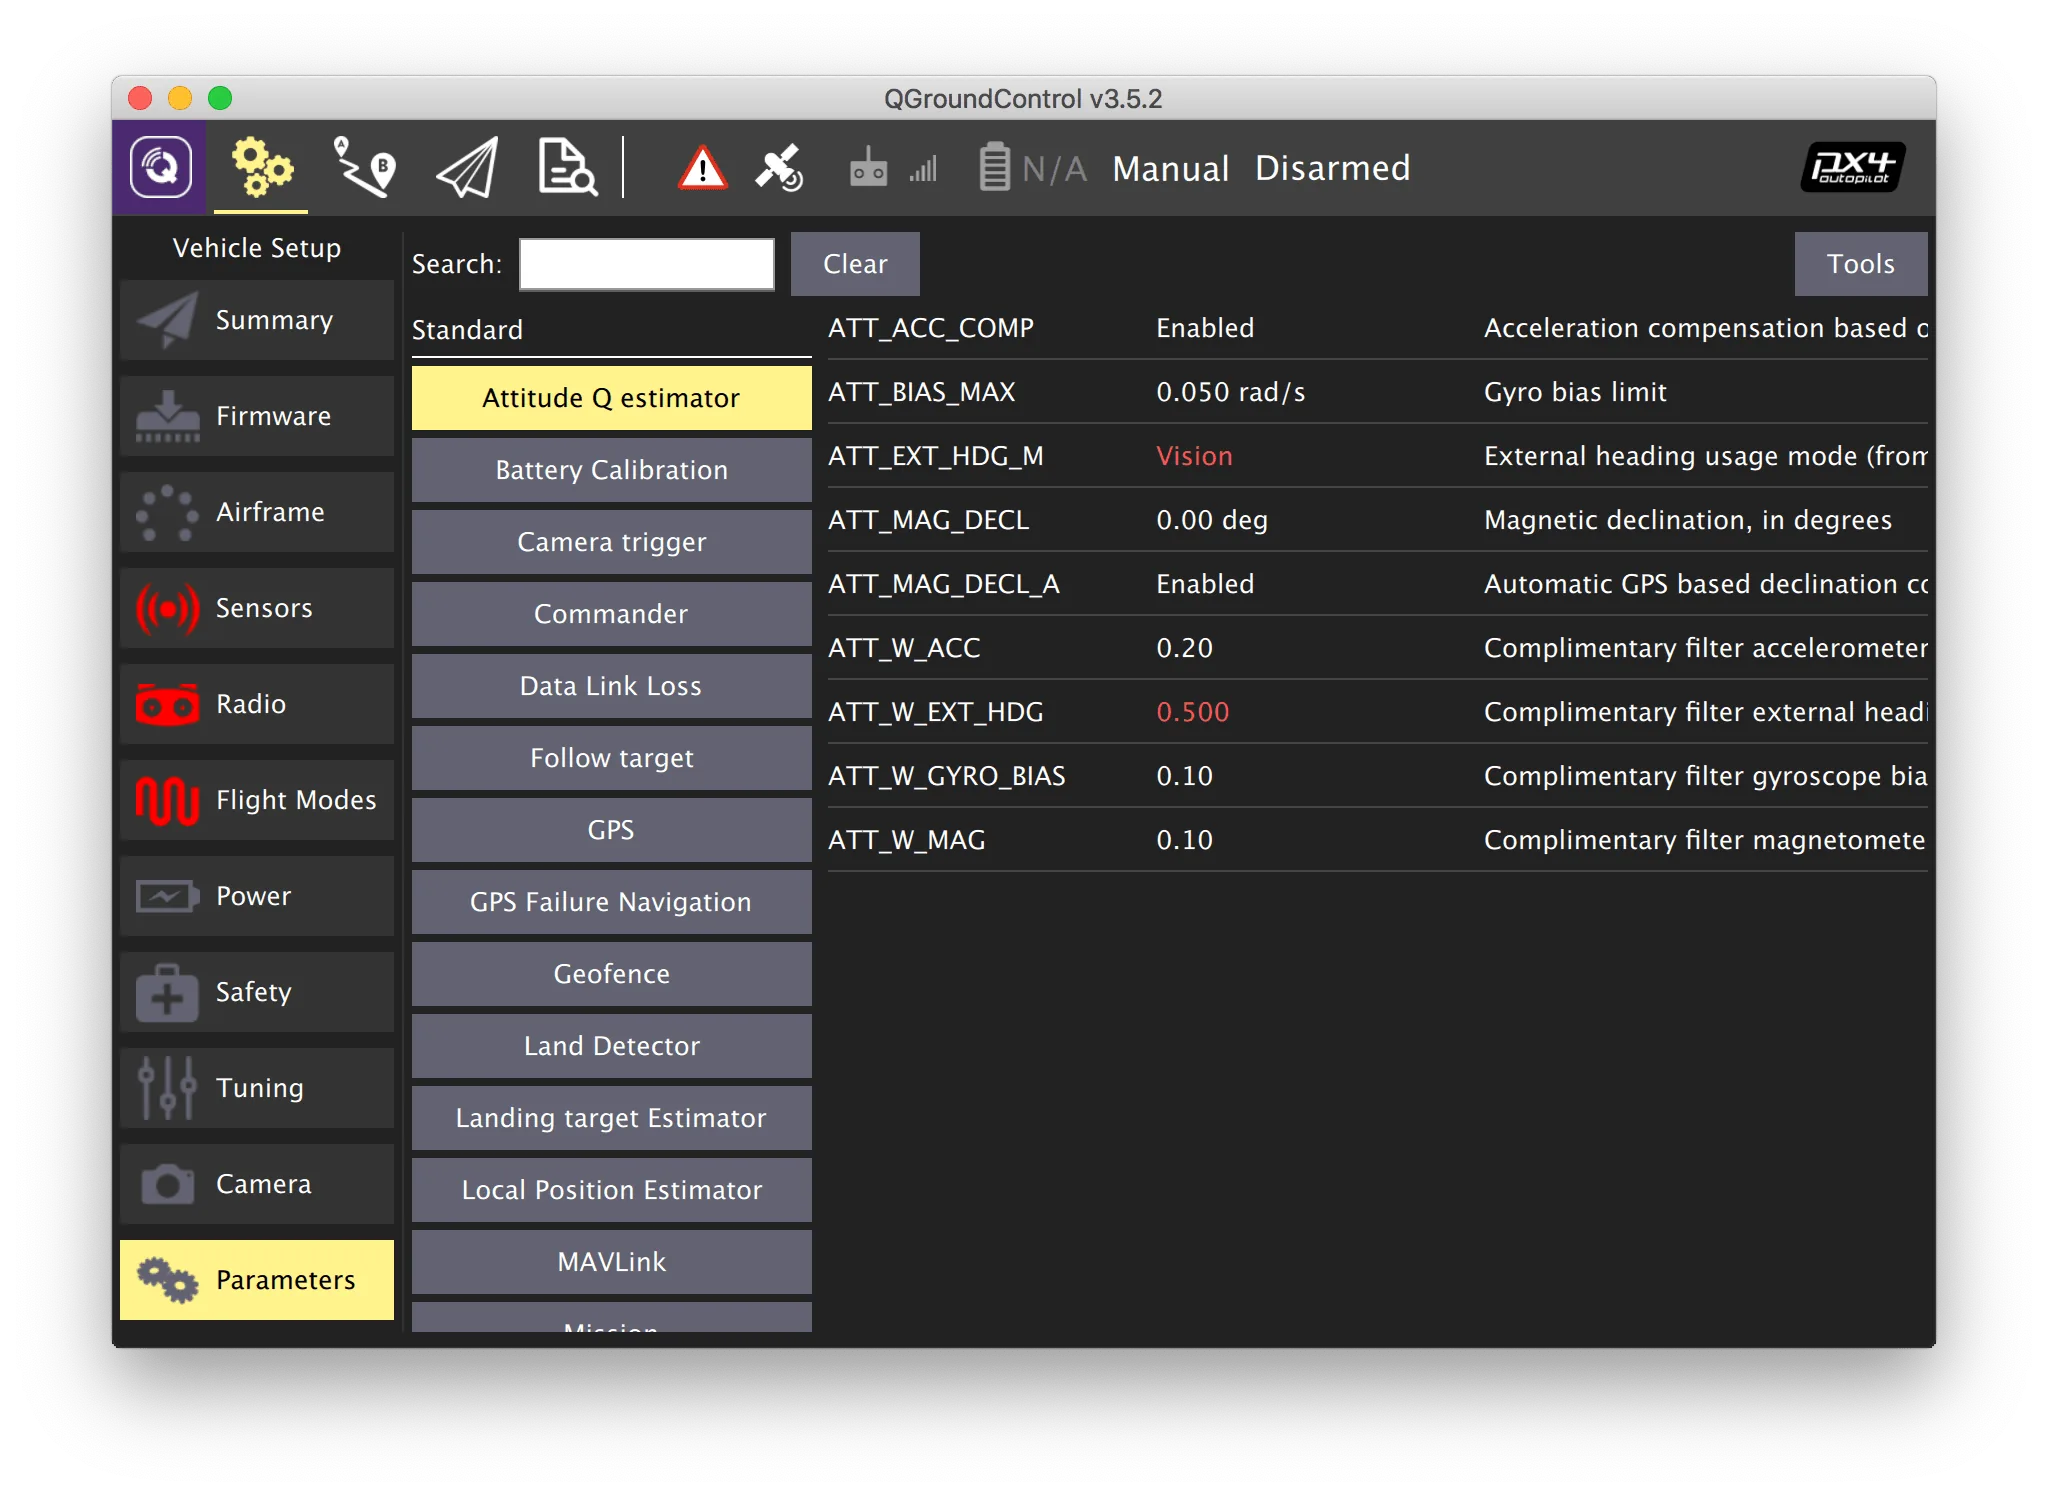
After setting a parameter, press Save. If needed, reboot the flight controller by pressing Tools > Reboot vehicle.
Parameter files
You can load a pre-configured preset via the Parameters tab menu: press Tools, then select Load from file... in the popup window and choose the .params file.
- Parameters for Clover 4: clover-4.params
- Parameters for Clover 5: clover-5.params
Configuring PID regulators
Averaged PID coefficients for Clover 5
MC_PITCHRATE_P= 0.176MC_PITCHRATE_I= 0.213MC_PITCHRATE_D= 0.0018MC_ROLLRATE_P= 0.176MC_ROLLRATE_I= 0.213MC_ROLLRATE_D= 0.0018MC_YAWRATE_P= 0.25MC_YAWRATE_I= 0.09MPC_XY_P= 1.8MPC_Z_P= 1.5MPC_XY_VEL_P_ACC= 3.45MPC_XY_VEL_D_ACC= 0.15MPC_XY_VEL_I_ACC= 1.0MPC_Z_VEL_P_ACC= 5.5MPC_Z_VEL_I_ACC= 2.3MPC_THR_HOVER= 0.4MPC_ACC_DOWN_MAX= 2.0
Averaged PID coefficients for Clover 4
MC_PITCHRATE_P= 0.072MC_PITCHRATE_I= 0.037MC_PITCHRATE_D= 0.0021MC_PITCH_P= 8.5MC_ROLLRATE_P= 0.072MC_ROLLRATE_I= 0.037MC_ROLLRATE_D= 0.0021MC_ROLL_P= 8.5MPC_XY_VEL_P_ACC= 2.2MPC_XY_VEL_D_ACC= 0.26MPC_XY_P= 0.9MPC_Z_VEL_P_ACC= 4.8MPC_Z_P= 1.2
Note that PID regulator parameters should be tuned manually for each specific assembled quadcopter for ideal flight. Learn more in the "PID tuning" article.
Next: Sensor calibration.