RPi Wi-Fi Setup via NetworkManager
Contents
- Changing the password or SSID (network name)
- Switching the adapter to client mode
- Switching the adapter to access point mode
- How RPi networking works with NetworkManager
You can configure networking on Raspberry Pi through NetworkManager and its text interface nmtui.
NetworkManager is a system service that manages network interfaces and stores connection profiles. In this case, the service is responsible for Wi-Fi settings on Raspberry Pi, while nmtui provides a convenient text interface for changing these settings without manually editing several configuration files.
With NetworkManager, you can switch the Raspberry Pi Wi-Fi adapter between two main operating modes:
- Client mode (Mode = Client) - Raspberry Pi connects to an existing Wi-Fi network.
- Access point mode (Mode = Access Point) - Raspberry Pi creates a Wi-Fi network that you can connect to.
Connect to Raspberry Pi locally or over SSH, then start the configuration interface:
sudo nmtui
Changing the password or SSID (network name)
- Run
sudo nmtui. - Select
Edit a connection.
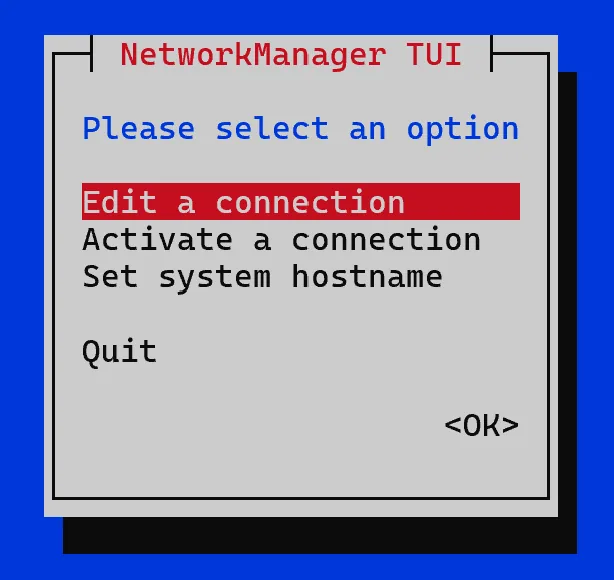
Figure 1 - Main nmtui menu with the Edit a connection item
- Select the
cloveraccess point profile and pressEdit(see Figure 2). If there is no such profile, create it throughAdd->Wi-Fi.
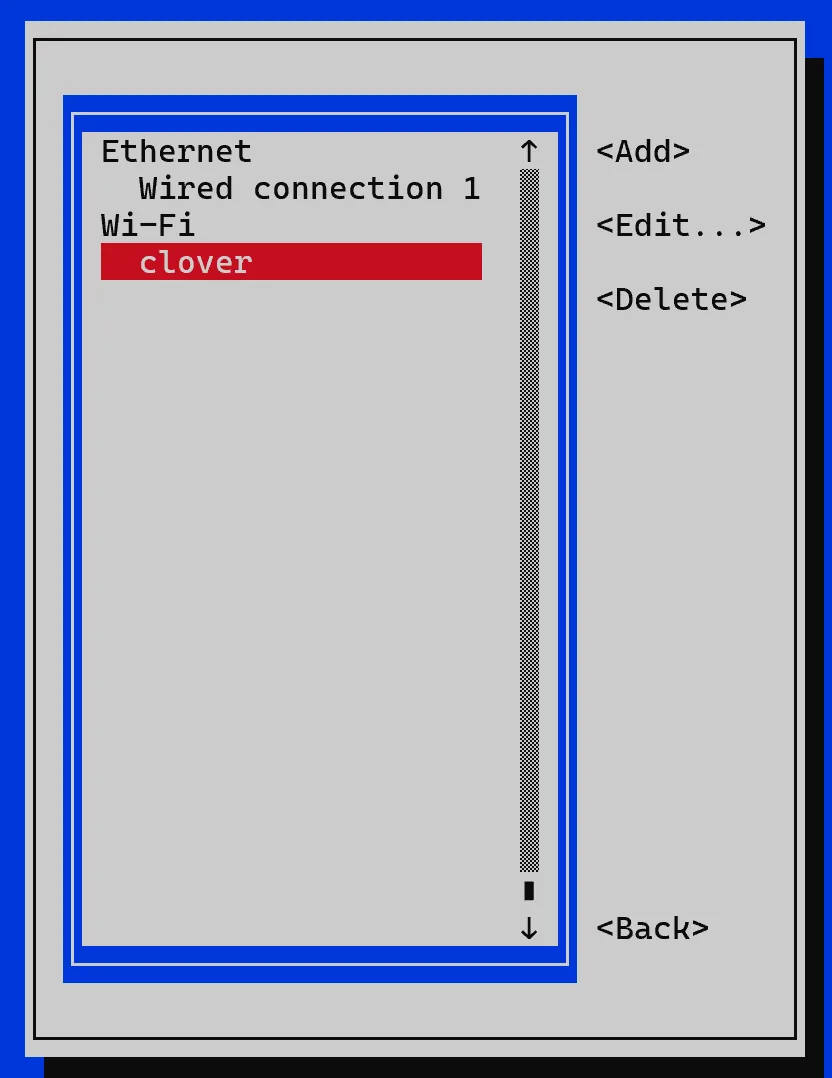
Figure 2 - Selecting a connection profile before editing
- In the profile edit window, change the
SSIDandPasswordfields, as shown in Figure 3:SSID- to change the Wi-Fi network name;Password- to change the password.
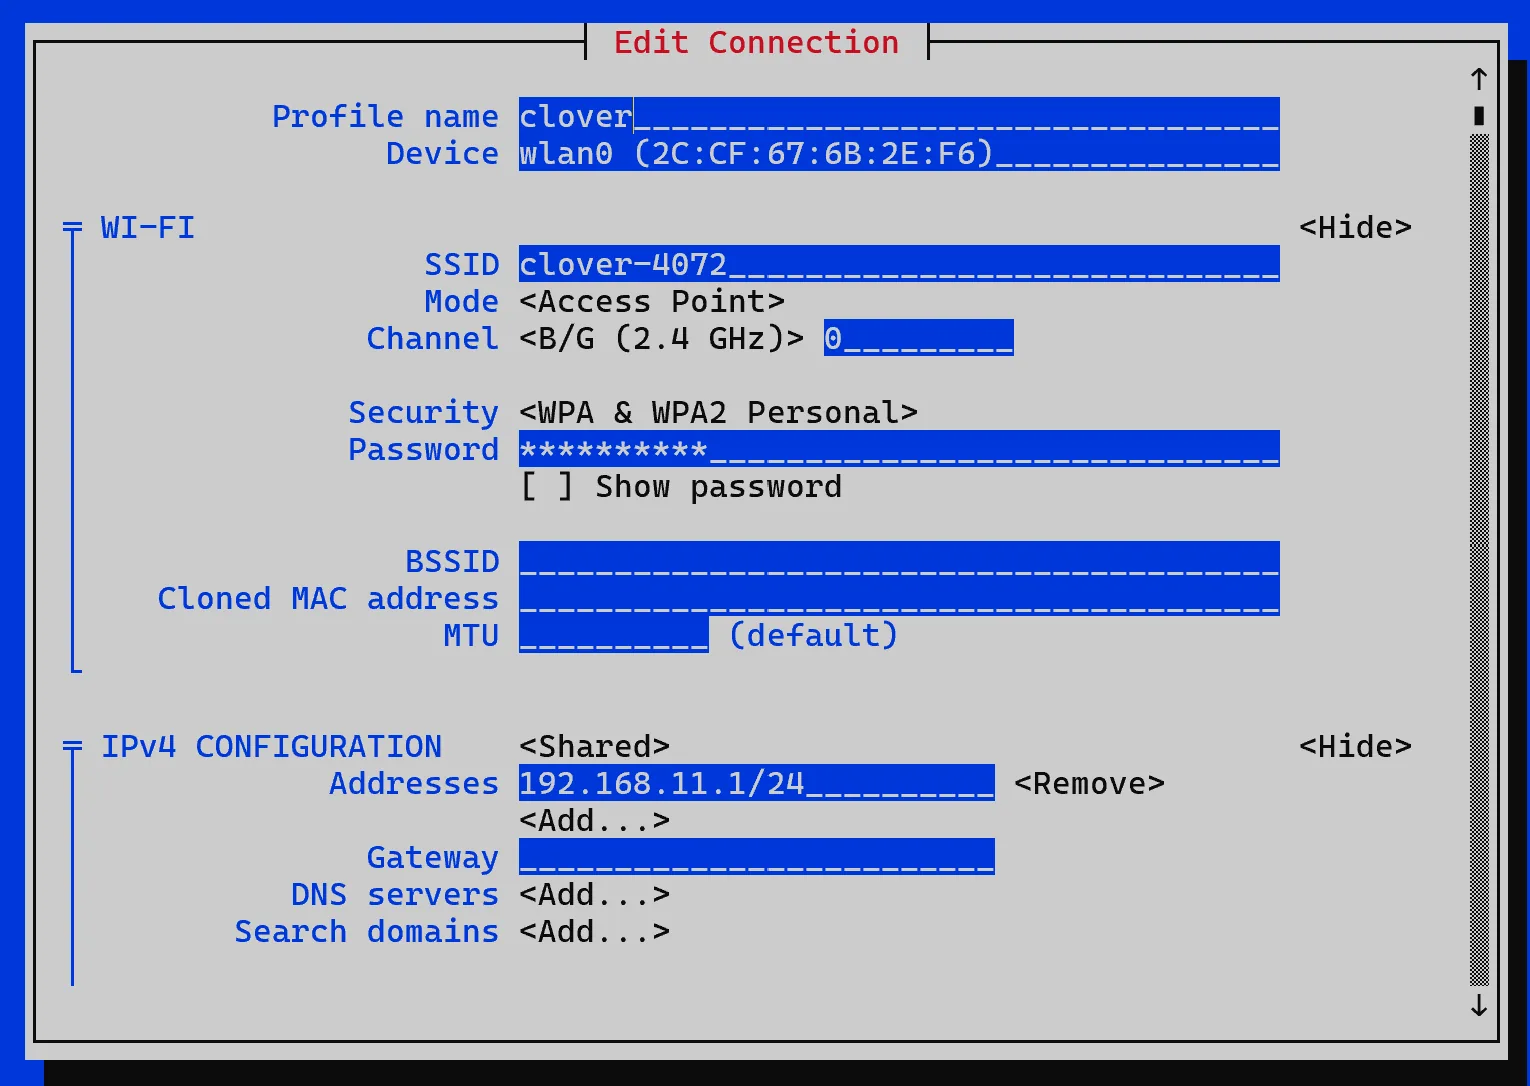
Figure 3 - Changing SSID and password in the access point profile
The Wi-Fi password must be at least 8 characters long. If you changed the
SSIDfield, after reactivation you will need to reconnect using the new network name.
- Press
OK, thenBack. - To apply the changes, run the command below and wait for NetworkManager to restart:
sudo systemctl restart NetworkManager
Switching the adapter to client mode
In client mode, Raspberry Pi connects to an existing Wi-Fi network.
- Run
sudo nmtui. - Select
Edit a connection.
Figure 4 - Main nmtui menu for opening the connection list
- Create a new profile by selecting
Add(see Figure 5).
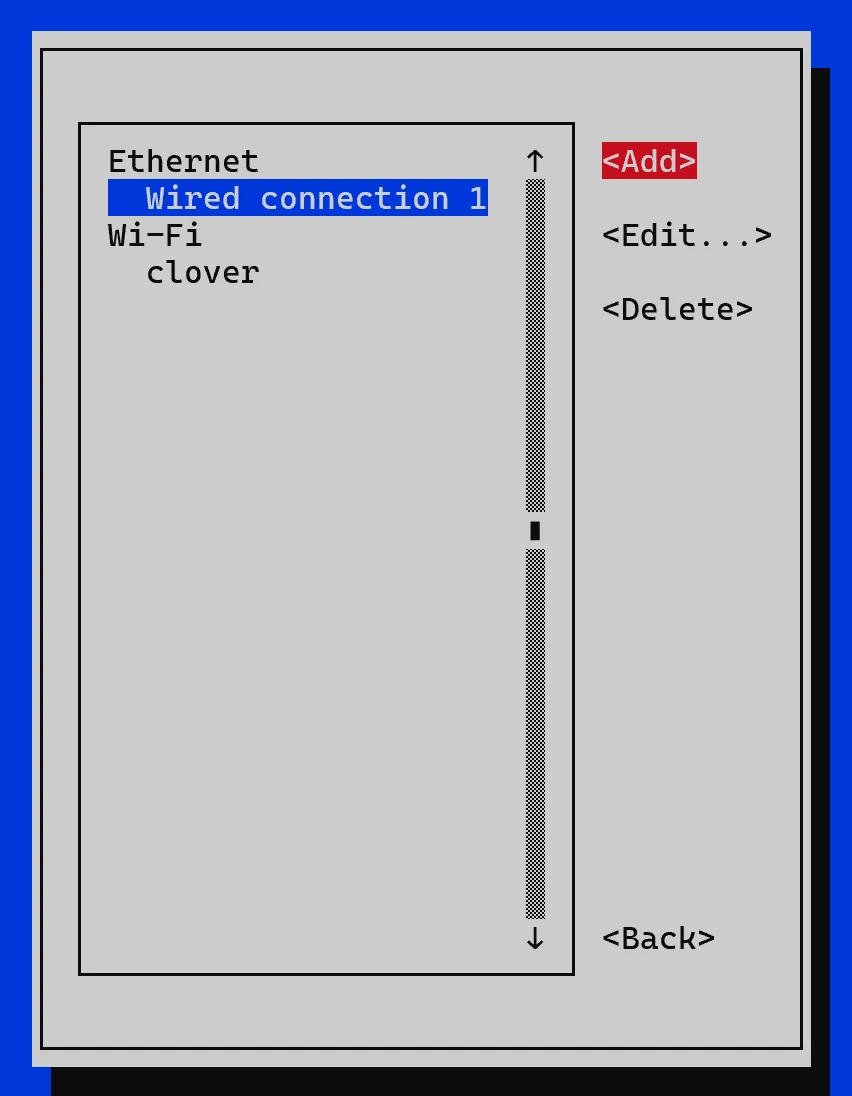
Figure 5 - Adding a new connection profile
- In the
New Connectionwindow, selectWi-Fi(see Figure 6).
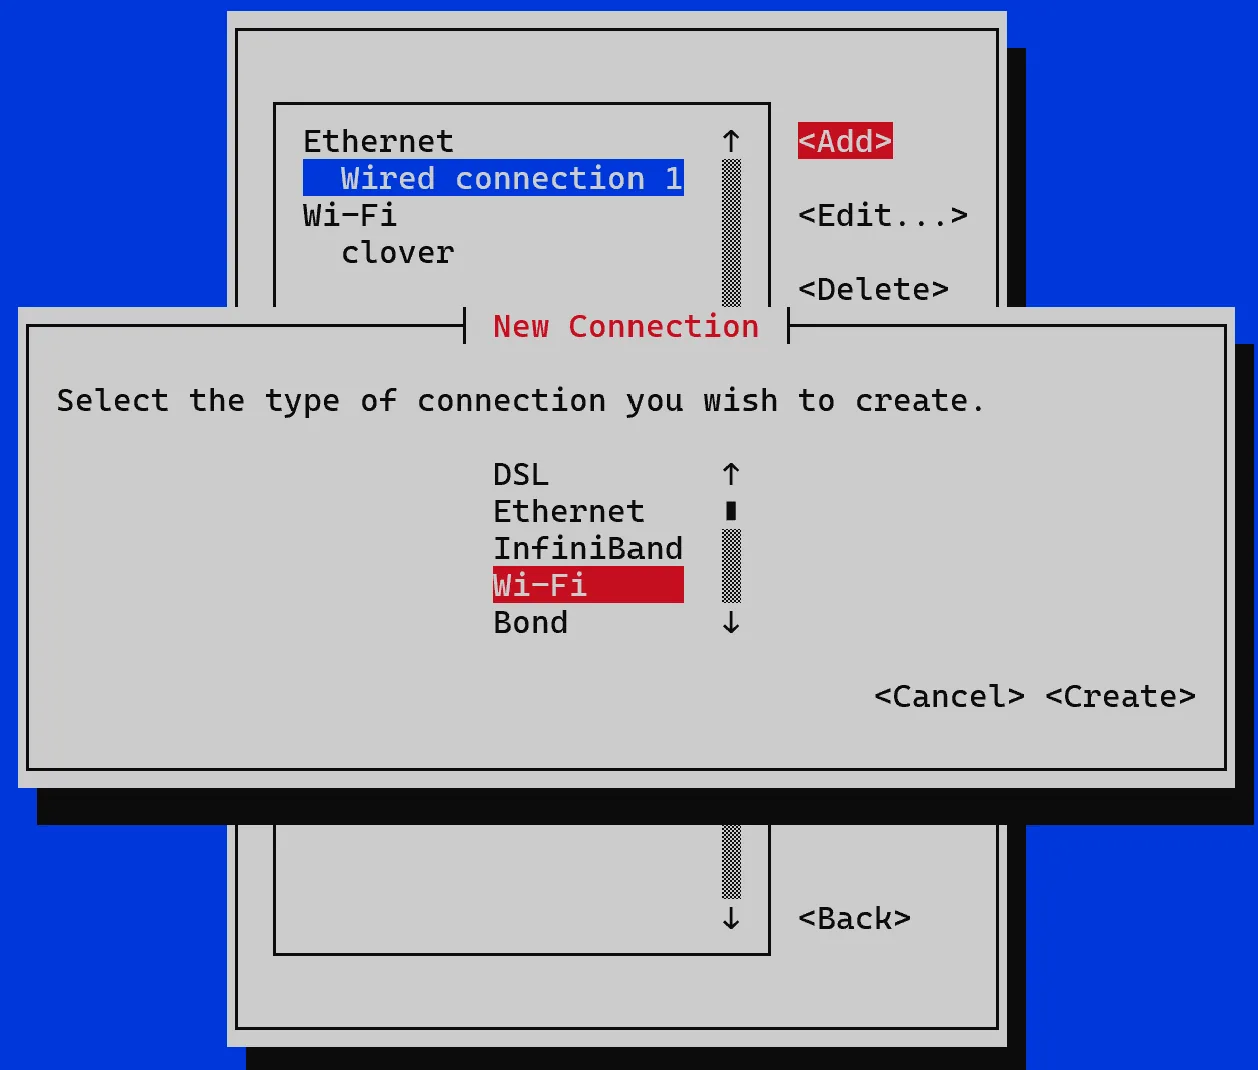
Figure 6 - Choosing Wi-Fi as the connection type
- In the
Edit Connectionwindow, selectSecurityand change the security protocol toWPA & WPA2 Personalor another protocol that matches your router settings, as shown in Figure 7.
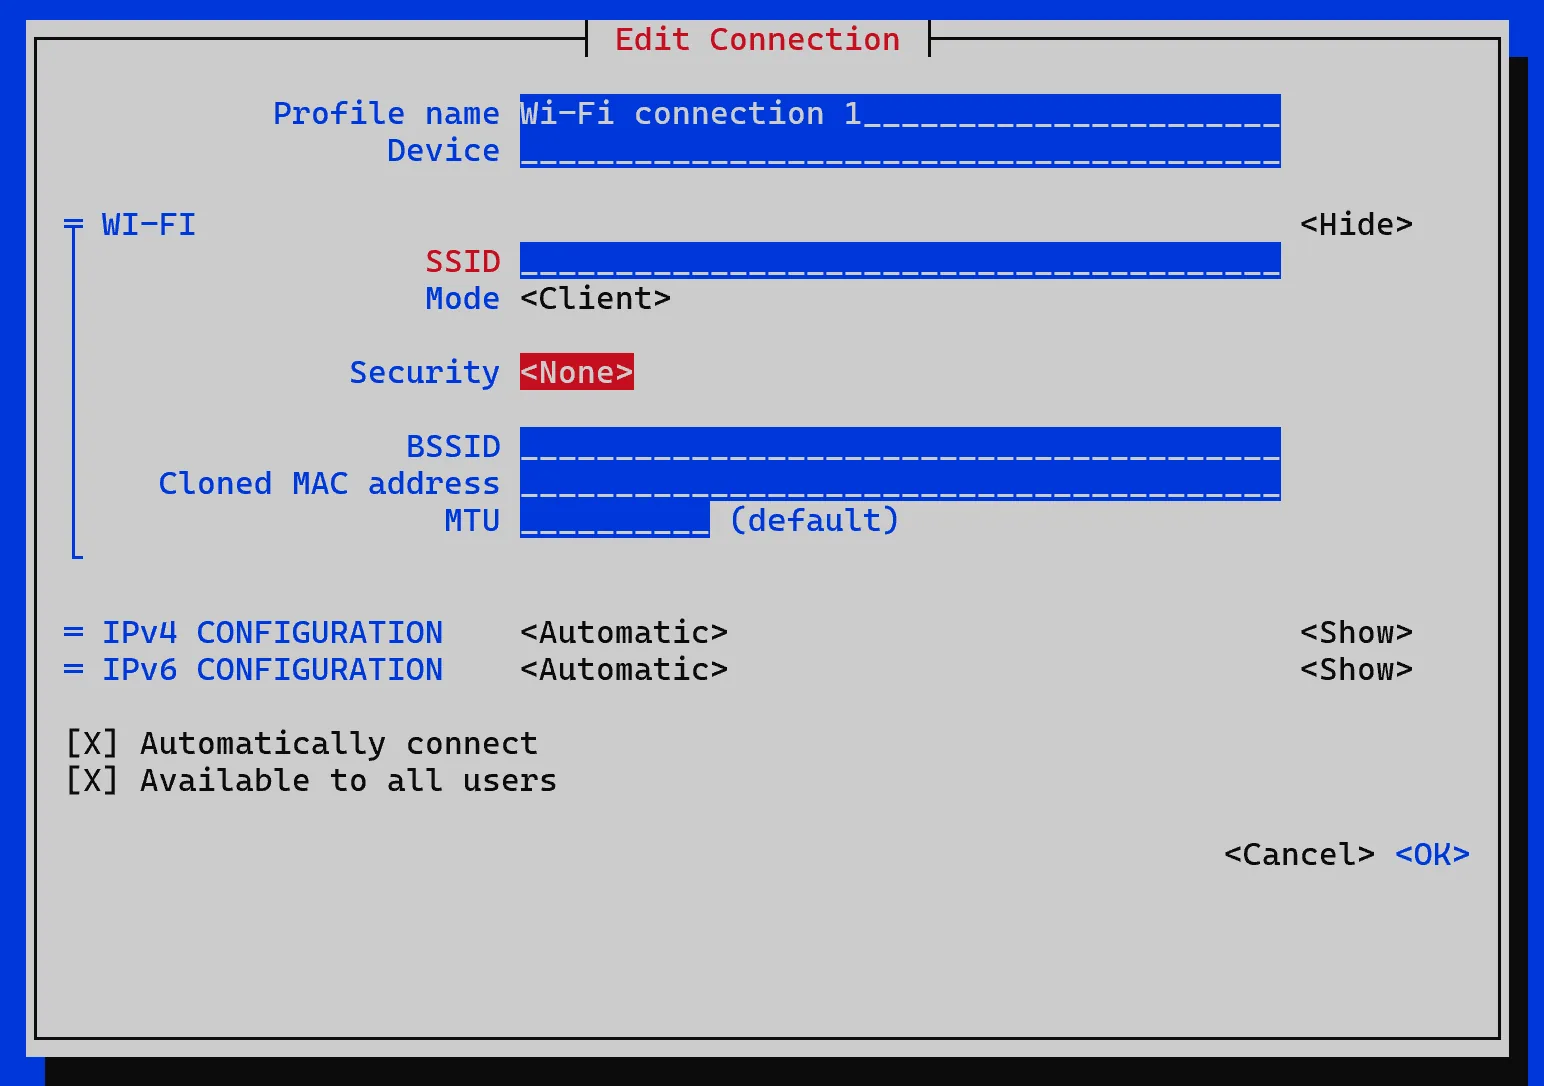
Figure 7 - Configuring security settings for the client mode profile
- Enter
SSIDandPassword, then pressOK(see Figure 8).
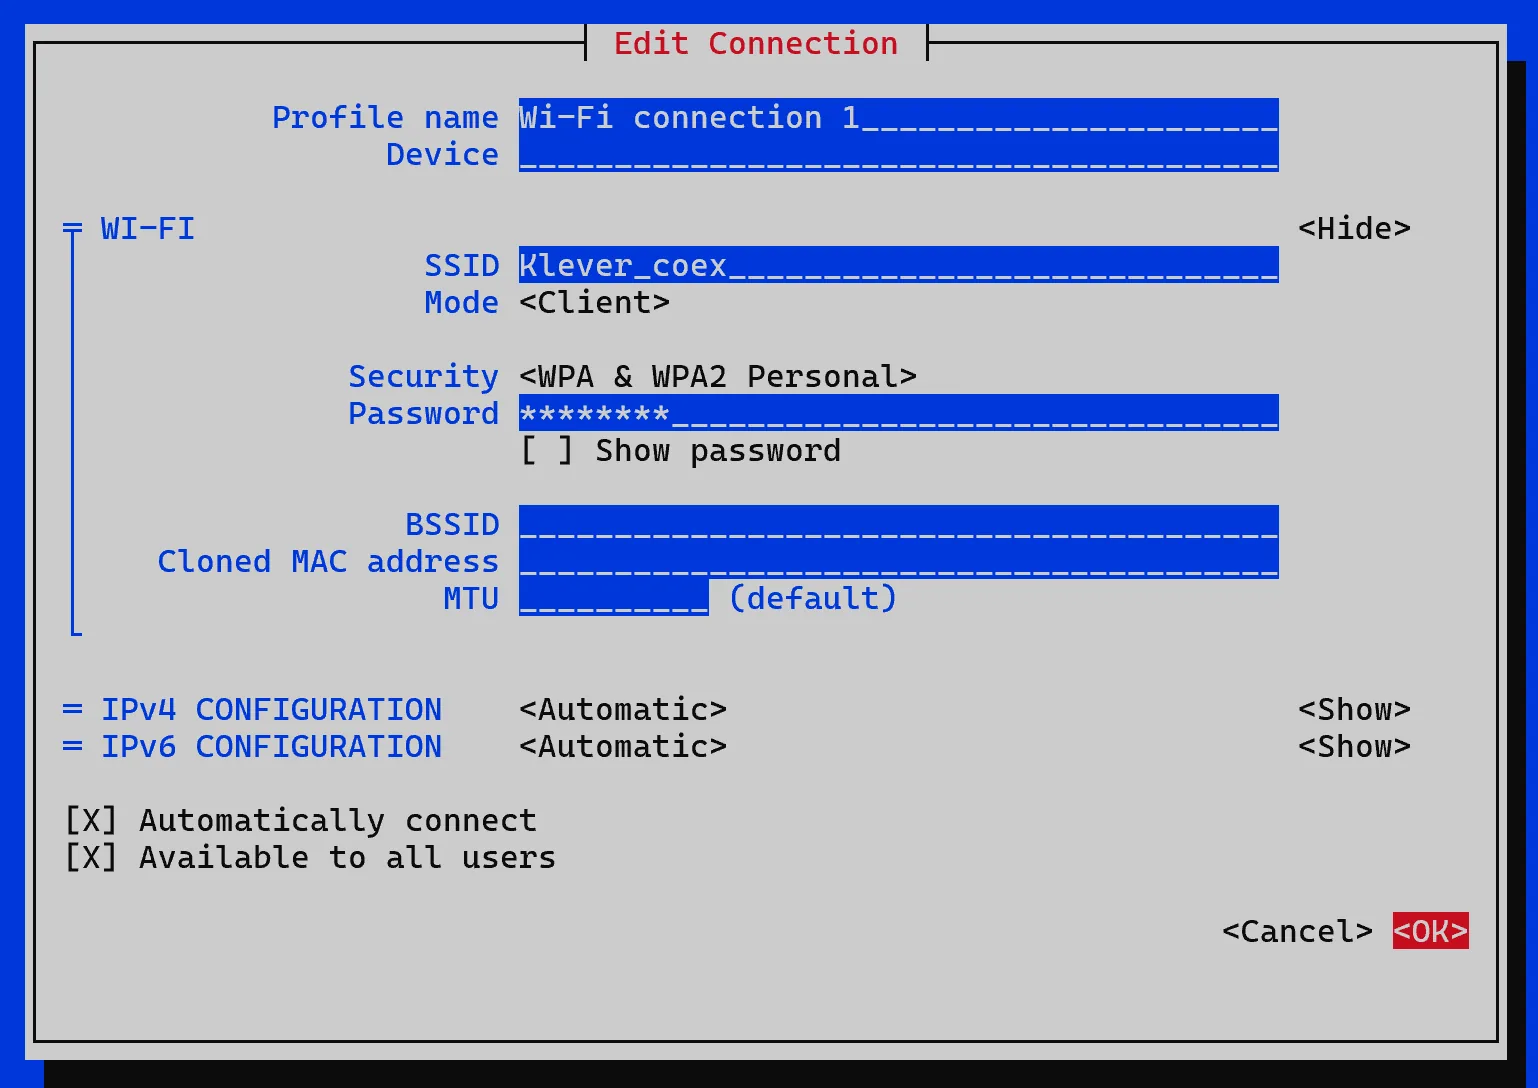
Figure 8 - Entering the network name and password for client mode
- Exit
nmtuiby pressingBack, thenQuit. Run the following command and wait for reboot:
sudo reboot
- Run
sudo nmtui. - Open
Activate a connection, select the profile you created (if you did not rename the network, it is usuallyWi-Fi connection 1), and pressActivate.
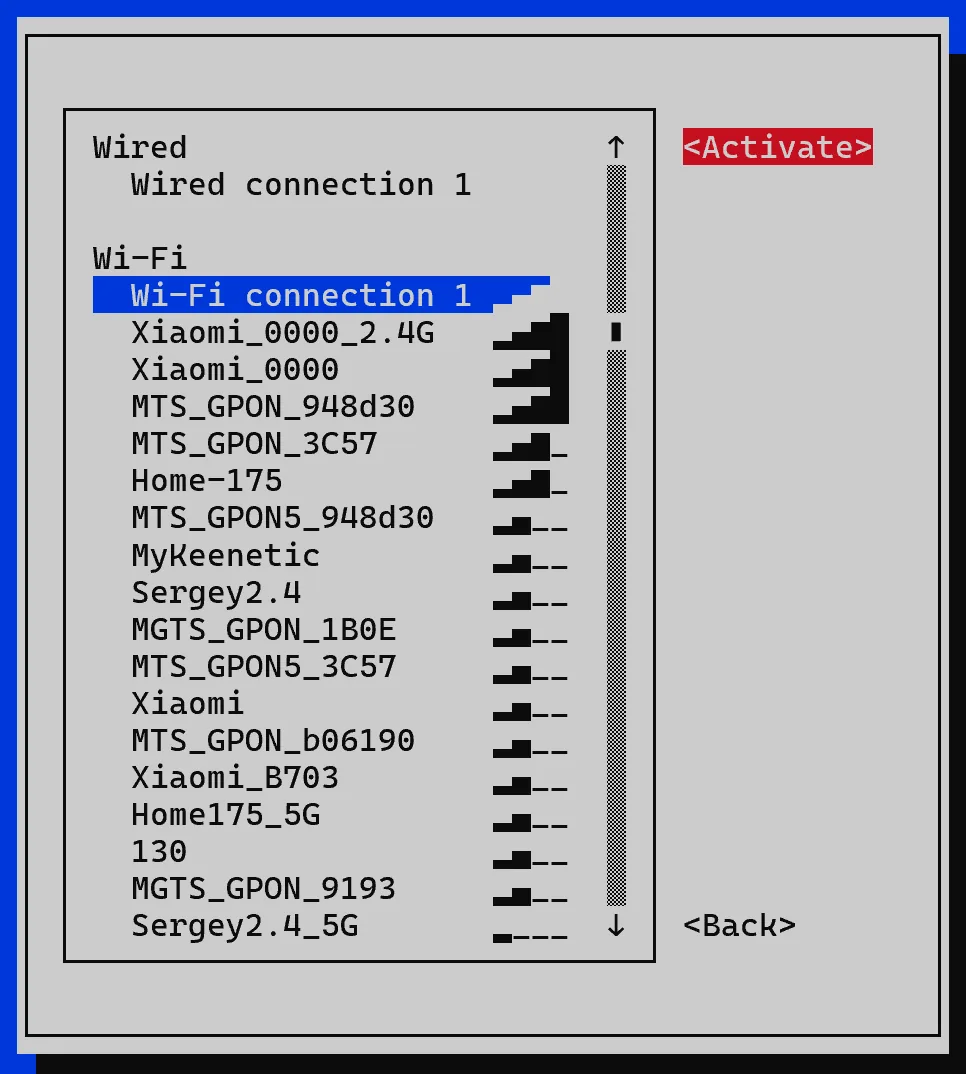
Figure 9 - Activating the created client mode profile
Wait for the reboot to finish. After that, Raspberry Pi will connect to your Wi-Fi network.
Switching the adapter to access point mode
In access point mode, Raspberry Pi creates a Wi-Fi network that you can connect to.
- Run
sudo nmtui. - Select
Activate a connection.
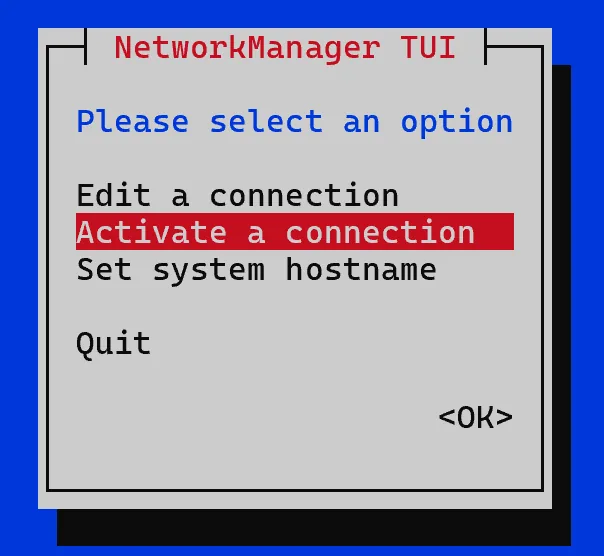
Figure 10 - Opening the list of active connections
- Select the created client profile and press
Deactivate, as shown in Figure 11.
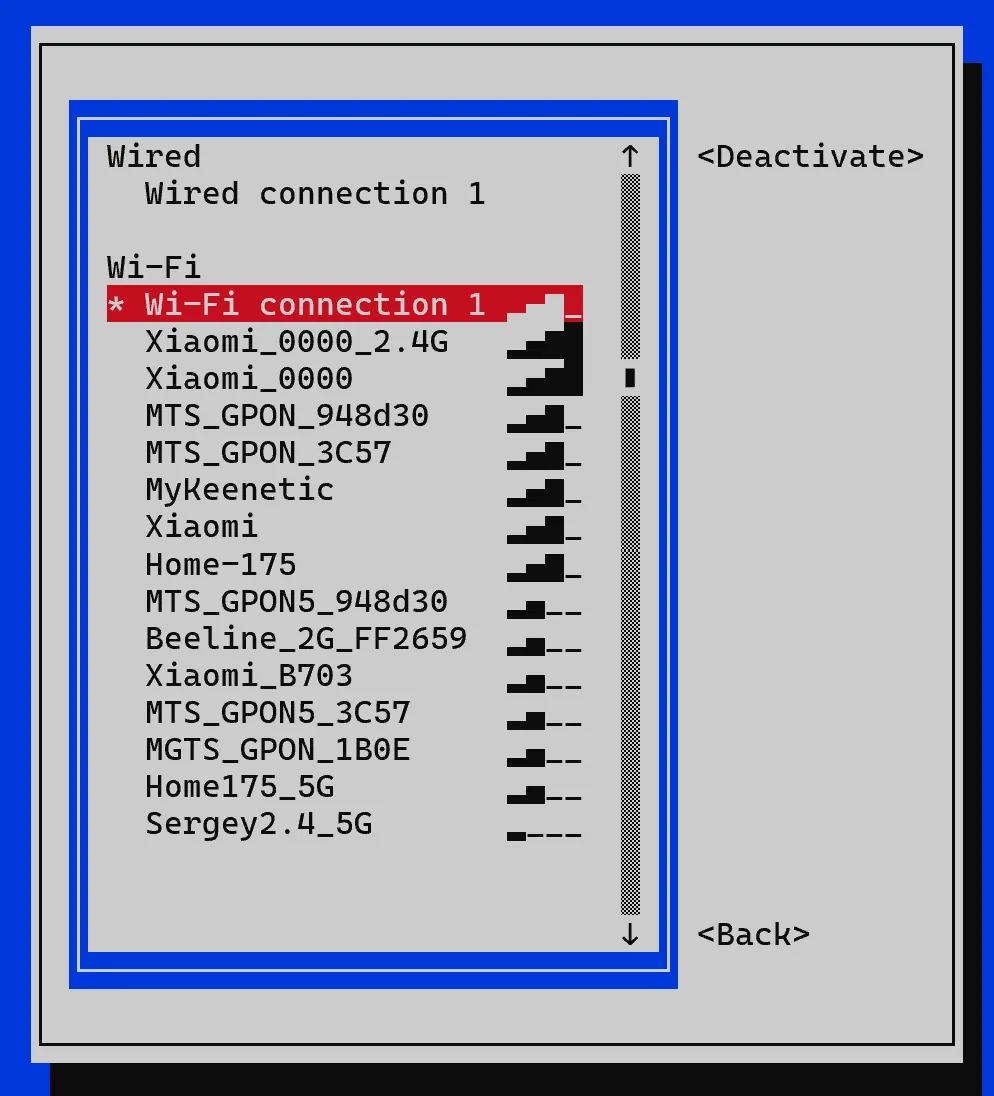
Figure 11 - Deactivating the active client profile to return to access point mode
Wait for the reboot. The standard
clover-XXXXnetwork will appear again.
How RPi networking works with NetworkManager
NetworkManager stores connection profiles and applies them to the required interface. For Wi-Fi, this is convenient because all main settings can be changed from the single nmtui interface instead of editing several configuration files by hand.
For client mode, a profile with Mode = Client and IPv4 CONFIGURATION = Automatic is usually enough. In this case, Raspberry Pi connects to an existing network and receives an address over DHCP.
For access point mode, you need a profile with Mode = Access Point and IPv4 CONFIGURATION = Shared. In this mode, Raspberry Pi creates its own Wi-Fi network and assigns addresses to connected devices.
NetworkManager profile files are usually stored in /etc/NetworkManager/system-connections/. In most cases, you do not need to edit them manually - it is more convenient to use the nmtui text interface.
When using NetworkManager, it is better to keep Wi-Fi and routing settings in one place. If the wlan0 network interface is configured at the same time through NetworkManager and manually through dhcpcd.conf, wpa_supplicant.conf, or a separate dnsmasq configuration file, configuration conflicts, unstable operation, or loss of connectivity may occur.